I know...I know. It's been ages since my last post. I had every intention of blogging as soon as we moved from California to Utah, but obviously never got around to it. Let's just say it was an awesome whirlwind of a summer and we did stuff almost everyday with our family!
Now, on to our new adventure! We have been in Colorado a week and just got internet installed so I'm feeling motivated. I wanted to start off with something I'm really excited about so here goes:
Before we left CA I decided to toss this ugly old trunk that was housing our stuffed animals (when it wasn't falling apart). So I set out to find something practical that wasn't one of those corner mesh nets from way back when. I found
this beauty on pinterest and immediately fell in love. Then I found
this tutorial and decided I for sure wanted to have the hubs build it. Well, he was a little busy this summer and never got around to it. I knew once school started it'd be impossible for him to find time to help and since we're in a new place, I might as well acquire new skills. Let me preface this by saying I have never built anything just out of raw wood. (unless you count making a mini truss in 7th grade wood shop class) Here's the proof...the raw wood:
Here's my first skeleton rectangle:
Now, I obviously don't know what I'm doing, but the guy at Home Depot didn't cut the pieces all exactly the same so I was a little disadvantaged. I can use a drill, I actually really enjoy using them. Well, I guess i'm not experience enough, and when I went to drill straight through the middle piece it was horrendous. I was not matched up or if I did get it straight through, it was a total diagonal. (see back left rod in the picture below) I had to get the hubs help to finish, I was too upset and frustrated!
Finally we got it all put together and I did the finishing touches:
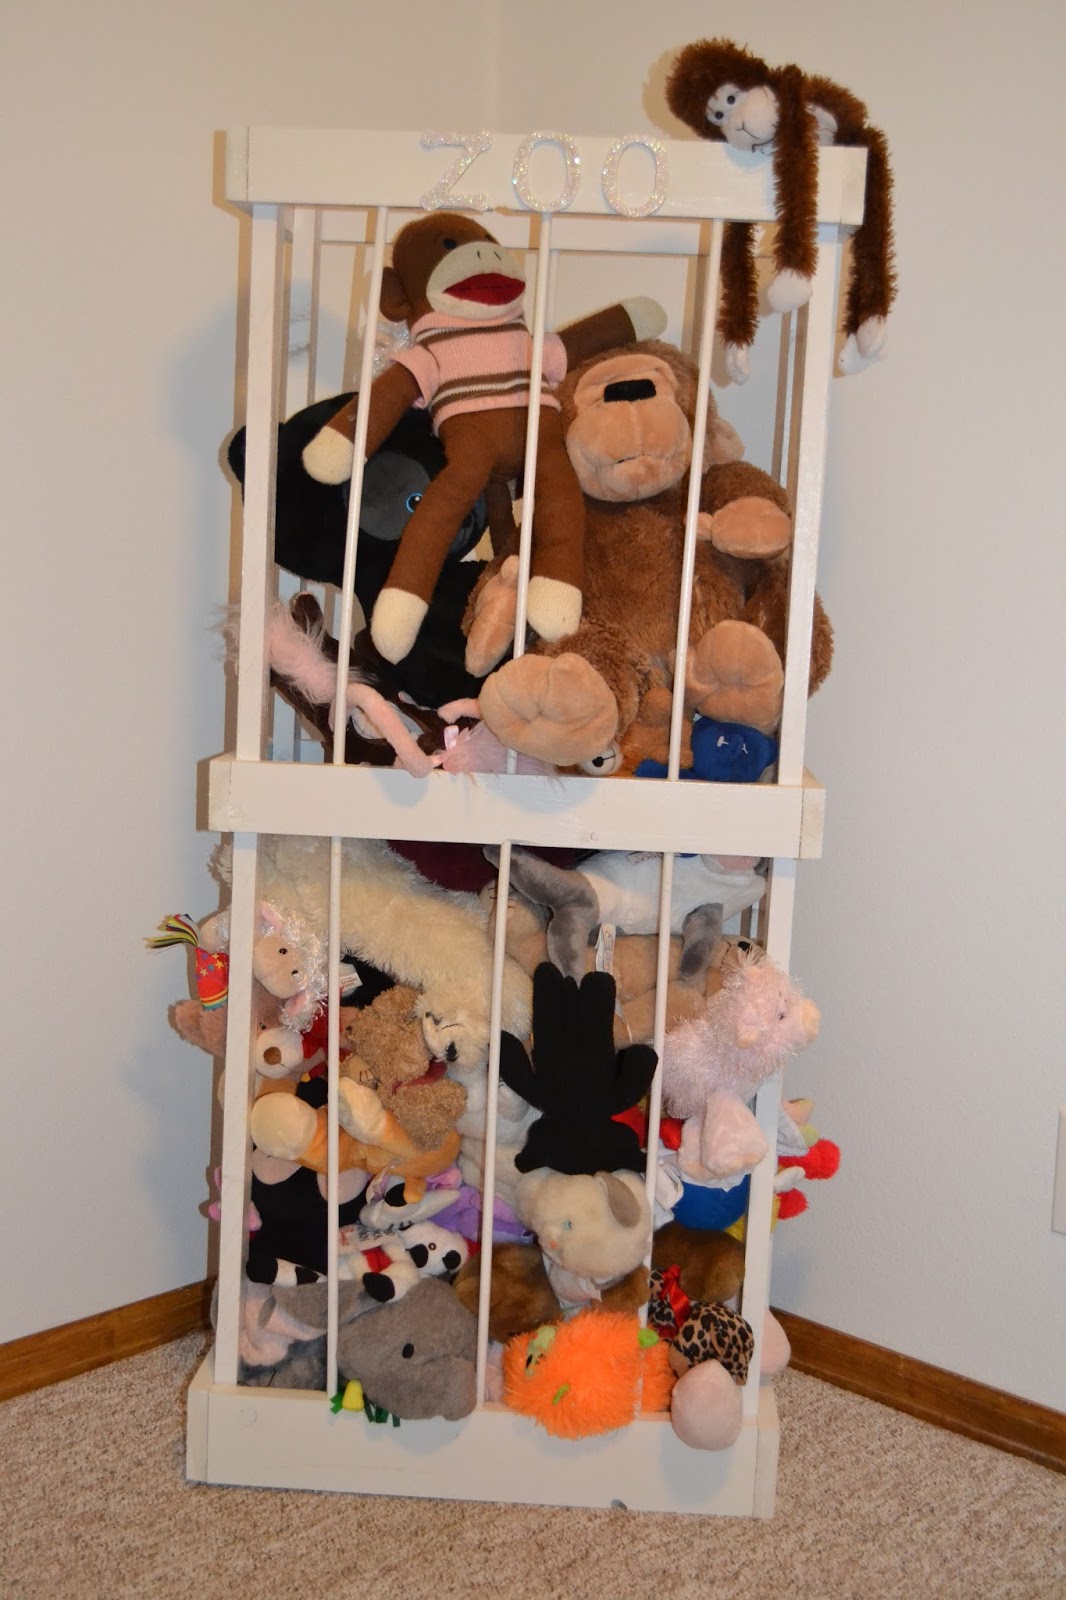
Here she is standing. (Please don't look at the imperfections!)
Because we bought the cheapest wood Home Depot had, I didn't love how it looked so I decided to paint it:
After 2 1/2 cans of spray paint and 3 applications of top coat, it was finished!
P.S. Don't buy spray paint from Michaels. Even with a coupon. It was terrible!
You can't really see them, but the girls insisted we get the white sparkle letters from Michaels.
Luckily the animals cover the imperfections and I think it does its job pretty well. (Even if one escaped :-)
I'm really glad I painted it white because it matches the organizer we just put in the playroom pretty well:
So here's to new adventures that await! What new thing have you tried lately?


5 comments:
I'm so impressed! I know you'll have confidence to try even more things now.
Wow! I have wanted to make this top, but was not brave. It looks awesome! Good job! Maybe I will get brave and give it a try.
So proud of you. Good job! It looks great :)
Look at you, that looks awesome! I love it!!
Nice work, Jess. That is a fun idea and turned out really cute. Great job.
Post a Comment